

- Where to Return Omamori in Japan: Notes on Shrines with Old Amulet Collection Boxes 01 - 2026-10-15
- Discover Kyoto Through Fragrance: 10 Unique Incense Shops to Visit Part 2 | Kiyomizu-dera and Yasaka Shrine Area - 2026-10-08
- Solo Stay at Juyoh Hotel: A Private Japanese-Style Room Near Minami-Senju, with Easy Bus and Subway Access Around Tokyo - 2026-09-28
Before going to Atami, I had always thought that there was only one type of one-day bus pass in the area. It was not until I arrived at Atami Station and went to the tourist information center, as I usually do, to collect travel brochures that I realized there was another bus pass operated by a different company. The routes covered by the two passes were also not quite the same.
This worked out well for me because the Kawazu cherry blossoms I had originally planned to see were not in bloom yet. Their blooming season had been delayed by about two weeks, so I suddenly had one extra day to stay in Atami. After checking the routes, I found that I could use the Atami Mankitsu Pass on this extra day. Since I ended up using both passes, I decided to write this article and share my experience for reference.
Although the two passes cover different areas, the good thing is that the service counters of the two bus companies are right next to each other. So even if you go to the wrong counter like I did, it is not a big problem. You can simply walk next door and find the correct one.
In this article, I will introduce the following points about these two passes:
- Where to buy them
- The areas and attractions covered by each pass
- Things to note when actually using them
- And one extra tip: where to use staffed luggage storage near Atami Station
The reason I also mention luggage storage is that the staffed luggage storage service is located right next to the two bus service counters. All three places are concentrated on the street directly across from Atami Station, so the route is very convenient.
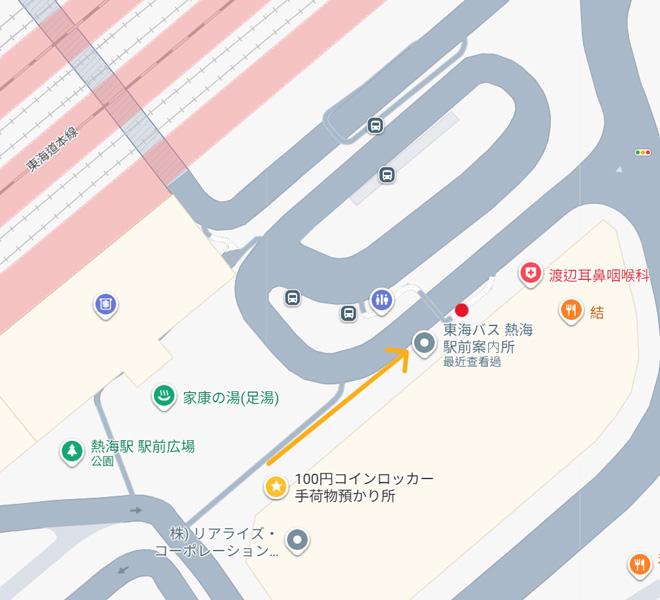
After exiting Atami Station, walk straight ahead and you will see the ATAMIX building. The building has a very eye-catching decorative wall with a blue sky, blue sea, and flying seagulls. Once you enter the building, you will see the “100円コインロッカー 手荷物預かり所” (100-yen Coin Locker and Luggage Storage) area.
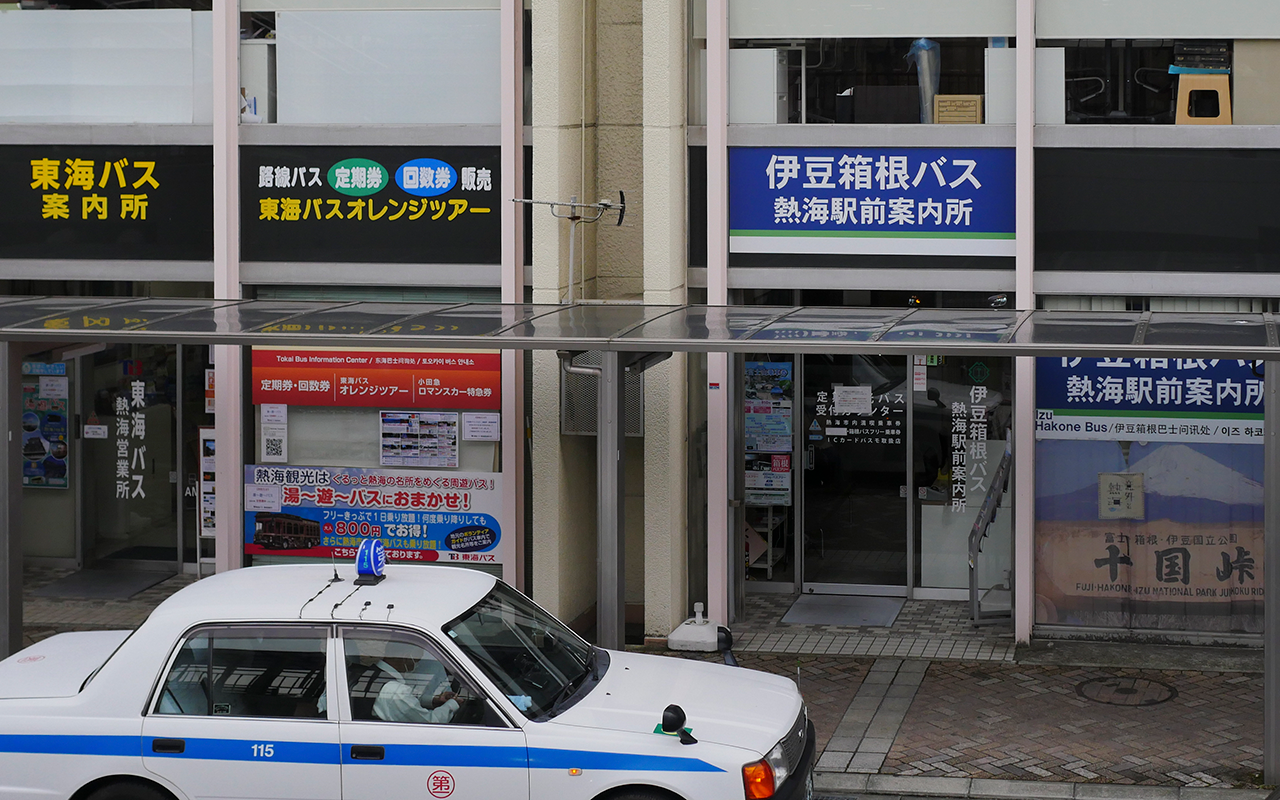
After that, turn left and walk about 100 meters. You will then find the service counters for Tokai Bus and Hakone-Izu Bus.

The bus platforms are right in front of the two service counters. However, there is one important thing to note: there is a half-floor height difference between the platforms and the service counters. Because of this, if you walk from the platform side, you may not be able to see the bus service counters.
This was exactly what happened to me. I walked around for a long time and almost became frustrated because I could not find them. So remember to go to the counters on the street level first to buy your ticket, and then go to the platform to take the bus.

- How to Use the Atami 1-Day Pass: Covered Routes and Things to Note
- Where Can You Go with the Atami Mankitsu Pass? Covered Routes and Best Times to Use It
- Where Should You Store Your Luggage? Staffed Luggage Storage Near Atami Station
- Conclusion: Which One-Day Pass Is Better for You? My Suggestions and Final Thoughts
How to Use the Atami 1-Day Pass: Covered Routes and Things to Note
The Atami 1-Day Pass is a one-day bus pass offered by Tokai Bus. It is also one of the tickets often seen on many Taiwanese travel platforms.
In the past, one main reason this pass was popular was that it included the Yu-Yu Bus (湯~遊~バス, a sightseeing loop bus). This sightseeing route connected several popular attractions in Atami, such as Atami Castle, Shinsui Park, the MOA Museum of Art, and Kinomiya Shrine. Because of this, the pass was often recommended as a convenient transportation option for a one-day trip in Atami.

However, the Yu-Yu Bus is currently not running on a stable schedule. When I visited Atami, the route was indeed suspended. Although it was briefly resumed while I was writing this article, it was suspended again later. In other words, even though the Atami 1-Day Pass is still being sold, it can no longer be used for the sightseeing loop bus that once made this pass so valuable.
Because of this, if your main purpose is to ride the Yu-Yu Bus, I recommend checking online first to see whether it is operating before buying the pass. However, the safest choice may be to buy the pass on-site. This way, you can avoid buying the ticket in advance only to find out that the sightseeing bus is still not running, which could affect your original travel plan.
Since the pass has lost this extra value from the sightseeing loop bus, its cost performance and convenience are honestly not as good as before. Before buying it, I suggest checking whether the stops you plan to use are within the Tokai Bus route area. At the service counter near the station, the staff are usually very helpful and can help you confirm whether your destination is covered by the pass.
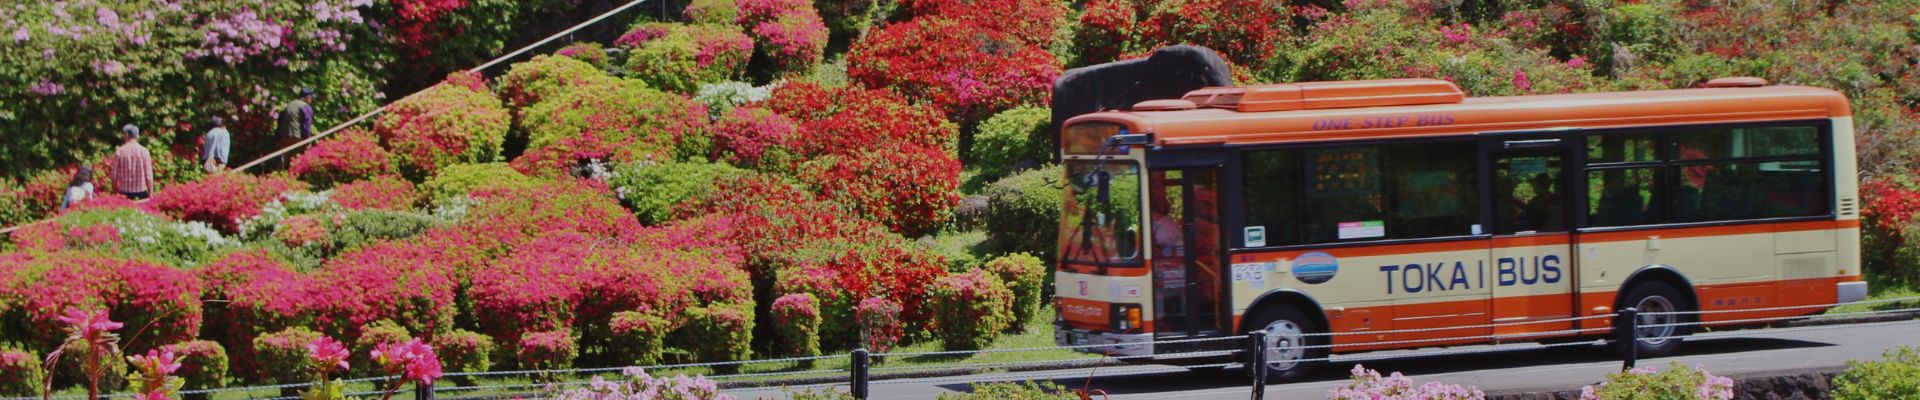
This pass is mainly valid on regular city bus routes operated by Tokai Bus. These routes start from Atami Station and extend toward the eastern and northern parts of the city. The common routes and attractions covered by the Atami 1-Day Pass currently include:
- Ajiro Port and the fishing port coastline
- MOA Museum of Art
- Izusan Shrine
- Omiya no Matsu, near Miyazaki Coast
- Atami Sun Beach
- Ginza Shopping Street and the Itogawa River area, including famous Atami cherry blossom spots
- Kiunkaku, although the bus stop is nearby and not right in front of the entrance
- Kinomiya Shrine
This pass is best for travelers who:
- Plan to take Tokai Bus several times in one day
- Want to visit several attractions in different areas, instead of only one or two places
- Do not want to keep paying for each bus ride separately
On the other hand, if your itinerary only includes one stop, such as Kinomiya Shrine or a place near Atami Station, buying a one-way ticket may be more cost-effective than buying a one-day pass.

Where Can You Go with the Atami Mankitsu Pass? Covered Routes and Best Times to Use It
Compared with the Atami 1-Day Pass, which is widely promoted on many Taiwanese travel platforms, there is much less Chinese-language information about the Atami Mankitsu Pass issued by Izuhakone Bus. However, based on my actual travel route, this pass was a better match for my transportation needs. It became an unexpected and useful discovery during this trip.

At first, this pass caught my attention because of its name. I thought it might be some kind of special ticket for visiting Taisho Roman-style cafés. However, after looking more carefully, I realized that it was actually a one-day bus pass for city bus routes in Atami. Within the covered area, you can get on and off the bus as many times as you like.
The reason I remember this pass so clearly is also a little funny. That morning, I accidentally went to the wrong service counter. I mistook the Izuhakone Bus counter for the Tokai Bus counter, and after trying to communicate for a while with gestures, I finally realized that they were tickets from different bus companies. It was quite an embarrassing moment. Because of this, I unexpectedly picked up a brochure for the Atami Mankitsu Pass at the tourist information center. After returning to my hotel, I started studying it more seriously.
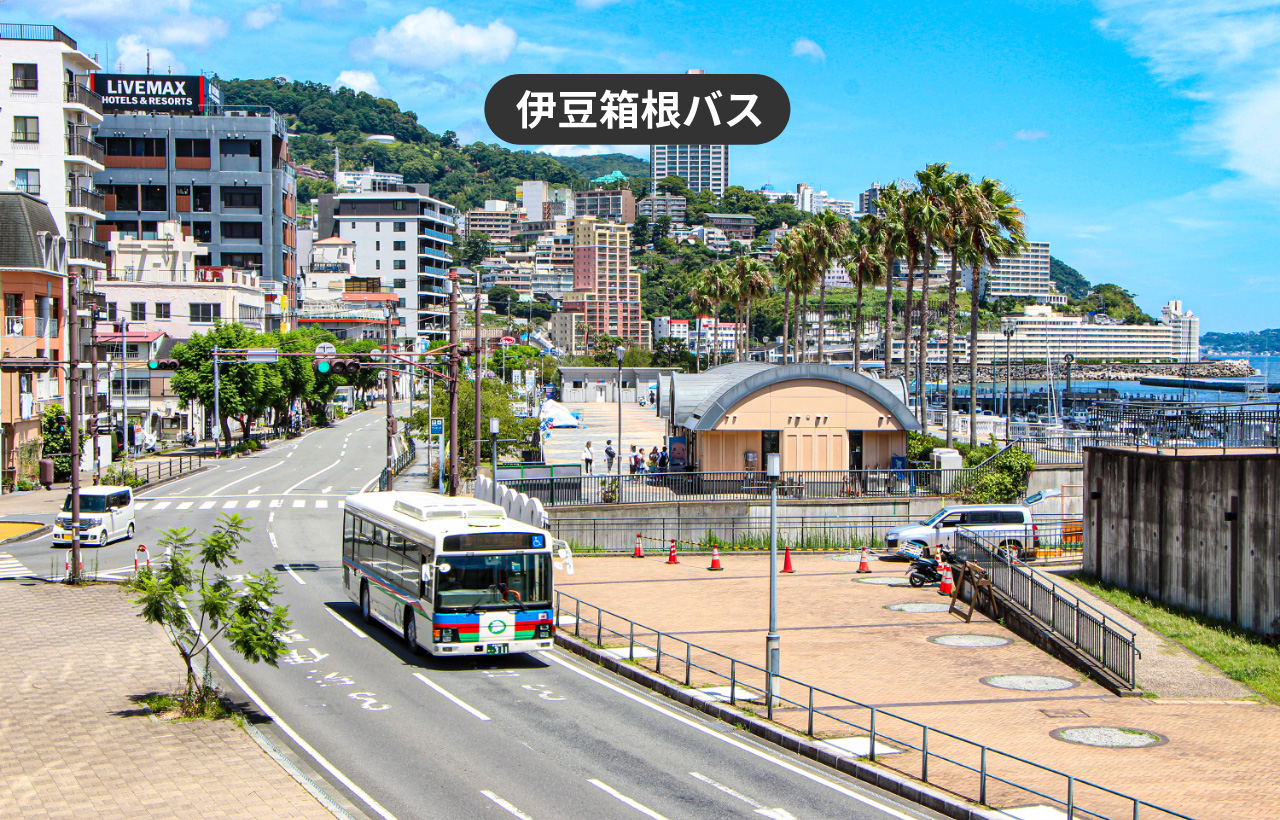
The Atami Mankitsu Pass mainly covers the western and inland areas from Atami Station. Many of its routes go through hilly areas, mountain roads, or residential commuter routes. Because of this, it is especially useful if you want to visit more inland attractions, such as Atami Plum Garden and Kinomiya Shrine.

The Atami Mankitsu Pass covers the following popular sightseeing spots:
- Omiya no Matsu, a pine tree area near Atami Beach
- Atami Sun Beach
- Ginza Shopping Street and the Itogawa River area, which are also famous for Atami cherry blossoms
- Kiunkaku, where you can get on and off right in front of the entrance
- Atami Plum Garden
- Kinomiya Shrine
- Atami Port
- Atami Korakuen, including the ocean-view foot bath and shopping facilities
If your itinerary is mainly focused on the Kinomiya Shrine and Atami Plum Garden area, like mine was this time, the Atami Mankitsu Pass covers the routes very well. You can already get your money’s worth after taking the bus three times. For travelers who do not plan to visit northern areas such as the MOA Museum of Art or Izusan Shrine, this pass is not only cheaper, but also more practical.
Izuhakone Bus also offers an upgraded version called the Zekkei Fujisan Pass (絶景富士山乗車券, a scenic Mt. Fuji bus pass). In addition to all the routes covered by the Atami Mankitsu Pass, this ticket also includes the bus route to Jukkoku Pass and a ropeway ticket. With this pass, you can enjoy both the city views of Atami and distant views of Mt. Fuji on the same day.

- Price: 1,700 yen for adults and 850 yen for elementary school students
- What is included:
- Unlimited bus rides between Atami Station and the designated areas within Atami City
- A round-trip ticket for the Panorama Cable Car (パノラマケーブルカー, Panorama Cable Car) between the Jukkoku Pass trailhead and the top of Jukkoku Pass
Jukkoku Pass (十国峠/じゅっこくとうげ, Jukkoku Pass) is a scenic mountain ridge located between Atami and Hakone. It is about 770 meters high. On a clear day, you can see beautiful views from the top, including Mt. Fuji, Suruga Bay, and Sagami Bay. It is also a hidden Mt. Fuji viewing spot recommended by local people and photography lovers.
If you plan to include Jukkoku Pass in your itinerary, this pass is much better value than buying the ropeway ticket and round-trip bus fare separately.
Izuhakone Bus also operates its own sightseeing bus called the Yume-chan Bus (ゆめちゃんバス, Yume-chan Bus). It is a specially painted bus designed for sightseeing in the Atami and Izu areas, and it usually runs between major tourist spots in Atami City or the Izu area. Unfortunately, I did not get to ride it this time. Luckily, I was able to take a photo of it before leaving. I hope I will have a chance to ride it next time.


Where Should You Store Your Luggage? Staffed Luggage Storage Near Atami Station
Although Atami is a popular tourist destination and there are naturally many coin lockers around the station, what I needed this time was not just a coin locker. I wanted to know if there was a place where I could leave my luggage with staff.
I had a 26-inch suitcase with me. It was not extremely large, but because my luggage was packed full for this trip, I had even opened the expandable part of the suitcase. It had almost become too bulky to fit into most standard-sized coin lockers. At one point, I even thought about using two lockers and forcing myself to split the luggage. But when I imagined having to repack everything at the station, it felt a little embarrassing.
Just when I was feeling stressed, an old Facebook post from before the pandemic saved me. The post mentioned that there was a place called 100円コインロッカー 手荷物預かり所 (100-yen Coin Locker and Luggage Storage) in front of Atami Station where staffed luggage storage was available. I immediately checked Google Maps. There were not many recent reviews, but it also did not show that the place was closed, so I decided to take a chance and go there. If it really did not work, then I would have no choice but to repack my luggage on the spot and use two lockers.
At first, I was worried that the place might be hard to find. However, as soon as I exited Atami Station, I saw the ATAMIX building right across the street, just like in the post. When I got closer, I immediately saw a clearly written blackboard sign explaining the luggage storage service. After entering the building and looking to the left, I saw a long line of people waiting to store their luggage, stretching so far that I could not even see the end. Most of them were Japanese travelers. It seemed that this was a very popular and practical luggage storage spot.

在At the storage counter, the process was simple and clear:
- The price depends on the size of your luggage, and each item gets one storage ticket.
- If small items such as tote bags can be fixed to your suitcase, they may be counted as one item.
- When picking up your luggage, you only need to show your storage ticket and number.
This was really generous. Like me, some travelers may have one large suitcase and one or two small bags. I had also seen this kind of staffed luggage storage at a tourist information center in Shinjuku, Tokyo before. As long as the bags were tied together, they could be counted as one item. This kind of flexible service for travelers is honestly very helpful.
The luggage storage counter is open during the daytime, and the latest pick-up time is 5:50 p.m. My plan that day was to take a train to Tokyo at around 5:00 p.m., so the timing worked out perfectly. However, if your itinerary may keep you out until the evening, make sure to check whether you can return in time to pick up your luggage.
Conclusion: Which One-Day Pass Is Better for You? My Suggestions and Final Thoughts
Overall, the Atami 1-Day Pass and the Atami Mankitsu Pass cover slightly different areas, but the real key is where you want to go during your trip. In my opinion, the biggest deciding point is Atami Plum Garden.
Atami Plum Garden is a place that the Atami Mankitsu Pass can take you to directly, while the Atami 1-Day Pass does not cover it. If you are visiting in spring to see plum blossoms, this is a very nice bonus. However, the plum blossom season is quite short. If you are not visiting during the flower season, whether this spot is attractive or not will depend more on your personal interests.
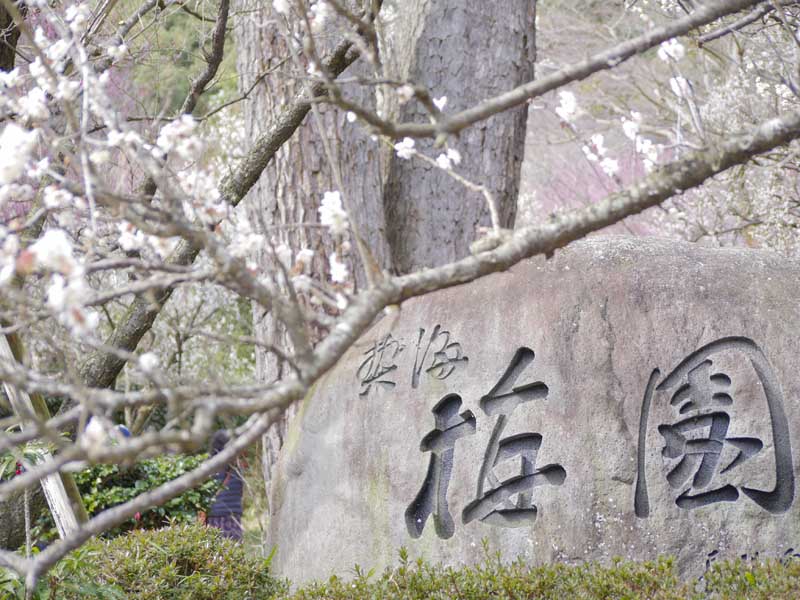
If you plan to visit attractions on the northern side of Atami, such as the MOA Museum of Art or Izusan Shrine, I would still recommend using the Atami 1-Day Pass by Tokai Bus. On the other hand, if most of your itinerary is focused on the city center, the western side of Atami, Kinomiya Shrine, and Atami Plum Garden, the Atami Mankitsu Pass should be more than enough.
Especially because the reopening of the Yu-Yu Bus has not been very stable, the Atami Mankitsu Pass may actually fit the main sightseeing routes better. It also provides a printed timetable, which makes it easier to plan your trip when the buses do not run very frequently.
After all, Atami is not a big city, and the buses here are not like city buses with electronic displays or real-time arrival information everywhere. Checking the timetable and bus stop locations in advance can help you avoid feeling rushed or confused during your trip.

For me, buying a one-day pass is not always about making sure I get my money’s worth. As long as the price is roughly close to the total cost of single rides, and I can also keep a nicely designed paper ticket as a souvenir, I already feel that it is worth it. After all, when taking trains, I may still have a magnetic ticket to keep, but when taking buses, there is usually nothing left. For someone like me, who enjoys recording trips and pasting travel memories into a journal, it always feels like something is missing.
Another reason I especially like using travel passes is that they give me some room for mistakes. If I accidentally take the wrong bus or miss my stop, I do not need to worry too much about extra transportation costs. This once happened to me in Ise. I missed the correct bus stop and ended up having to take a one-and-a-half-hour train ride back to the city center. Luckily, I had the Kintetsu Rail Pass that time. Otherwise, it would have cost me quite a lot in transportation fees.
*Unless otherwise noted, all photos in this article were taken by the author (yanshoto.com) during personal travels and are fully copyrighted. Please do not reproduce or use them for commercial purposes without prior permission. Thank you for your understanding and respect.

